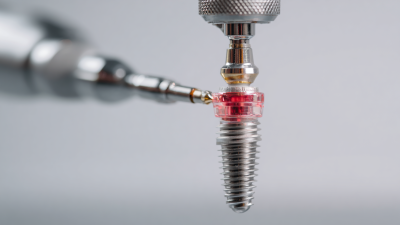
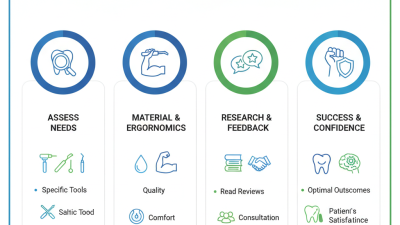
Picking out the best Implant Drill isn’t just about scanning prices, brands, or product pictures. It directly impacts how precisely you can do the osteotomy, how well you control heat, the tactile feedback you get, and your confidence during the procedure. Honestly, a drill that feels super smooth in a catalog might not perform the same way when you’re working in dense bone, tight ridges, or hard-to-reach spots.
Dr. Carl E. Misch, who’s pretty much a legend in implant dentistry, once said, “The key to long-term success is proper diagnosis and treatment planning.” That advice is still spot-on when choosing your implant drill. Things like diameter, flute design, cutting efficiency, irrigation paths, material quality, and compatibility with your surgical motor all need careful thought. For example, a Trephine Drill might be great for specific bone removal or implant-removal tasks, but it’s not your go-to for routine osteotomy prep. Always let the clinical goal guide your choice.
Here are seven practical tips that focus on real-world decisions rather than just eye-catching specs. First, check how well the drill cuts. Then, look at the irrigation channels—are they easy to access? Make sure the dimensions fit your setup. Read the sterilization instructions carefully. Think about how well you can see what you’re doing during use. Compare the manufacturer’s testing results and whether they offer clinical support. And don’t forget to consider the total cost over multiple procedures—not just the initial purchase price.
Those tiny details can make a big difference.
Even seasoned clinicians can sometimes overlook whether the handpiece is fully compatible or if visibility will be limited when irrigating. I’ve also come across product descriptions that seem precise but leave out important limitations—that’s often a red flag. Reputable brands like Nobel Biocare or Straumann usually provide detailed technical info and training resources, which is helpful. But honestly, no brand can replace good planning, controlled drilling speed, proper irrigation, and sound judgment. Ultimately, the best Implant Drill is the one that fits your specific case, your system, and your proven experience.
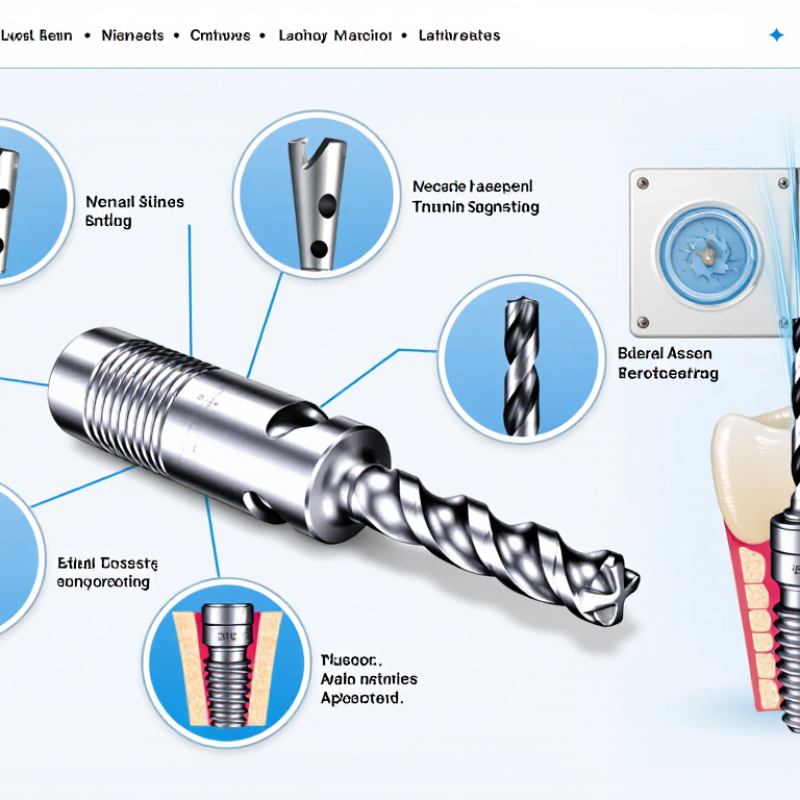
Choosing the best Implant Drill begins with its function, not its appearance.
Tip 1:Define the procedure. A Pilot Drill, twist drill, and countersink each serve different stages.
Tip 2: Match the drill to the bone condition. Dense cortical bone may require sharper cutting edges and controlled irrigation. Softer bone needs stability, not aggressive removal.
Small details matter.
Tip 3: Examine the geometry closely. Flute depth affects debris removal, while the cutting angle influences heat and control.
Tip 4: Check the drill length against the planned site and surgical visibility. A longer shaft is not always better.
Tip 5: Confirm diameter markings and depth stops. Clear markings reduce measurement errors during placement.
I have found that rushed visual checks can create avoidable problems.
Tip 6: Verify system compatibility before use. The drill connection must match the surgical handpiece and motor. Its diameter sequence should also follow the implant system’s documented protocol. Guided procedures require careful checking of sleeves, offsets, and available clearance.
Tip 7: Review the manufacturer’s instructions for speed, torque, irrigation, cleaning, and sterilization. Do not rely on memory alone. A drill may look compatible yet perform poorly under load. Clinical experience helps, but documented specifications remain more reliable.
Choosing the best Implant Drill requires more than checking sharpness. Material, coating, and shank geometry affect cutting control, heat, and instrument life. Stainless steel offers practical toughness and predictable sterilization performance. Carbide can maintain a sharper edge, but it may chip under lateral loading. Titanium nitride coatings can reduce friction, although coating damage may remain invisible. I have learned that a glossy surface is not proof of safety.
Tip 1: Match the shank to the handpiece before comparing cutting performance. ISO 1797:2017 defines dental rotary-instrument shank dimensions and retention types. Confirm the nominal diameter, working length, and latch geometry. A Pilot Drill Dental Implant may fit physically, yet still run poorly if its retention profile is unsuitable. Small mismatch, big vibration.
Tip 2: Check evidence for coating durability, not only initial smoothness. Laboratory research published in dental materials journals commonly measures temperature, torque, wear, and surface damage after repeated cycles. Irrigation remains critical because heat can compromise bone. WHO’s Global Oral Health Status Report 2022 estimates that oral diseases affect nearly 3.5 billion people, reinforcing the need for reliable, repeatable instruments. Tip 3: Review the manufacturer’s test data, sterilization limits, and ISO documentation. No drill is universally best. Clinical preference should follow verified dimensions, controlled technique, and honest inspection after use.
| Tip | Selection Dimension | Options to Compare | Evidence-Based Considerations | Practical Buying Check |
|---|---|---|---|---|
| 1 | Match the drill to the surgical procedure | Pilot Drill, twist drill, tapered drill, countersink, or step drill | Drill diameter, flute geometry, taper, and cutting-edge design should correspond to the planned osteotomy sequence and implant dimensions. A drill intended for one diameter or implant system should not be assumed suitable for another. | Confirm the working diameter, cutting length, overall length, and manufacturer-stated surgical application before purchase. |
| 2 | Compare drill materials | Hardened stainless steel: corrosion-resistant and commonly used for reusable dental instruments Tungsten carbide: very hard and wear-resistant, but more brittle Diamond-coated steel: abrasive cutting surface for selected applications | Carbide can maintain a sharp cutting edge but may chip if bent or subjected to lateral loads. Stainless steel generally offers greater toughness. Diamond-coated instruments cut through abrasive particles rather than using a conventional sharp flute and may have different cutting behavior. | Choose hardness for edge retention, toughness for resistance to bending, and confirm that the material is approved for the intended sterilization cycle. |
| 3 | Evaluate surface coatings | Uncoated: simplest surface and easier to inspect TiN: hard ceramic coating, typically gold-colored TiAlN or DLC: hard, low-friction coating options | A coating may improve surface hardness, reduce friction, or increase wear resistance, but it does not automatically improve cutting performance. Coating adhesion, edge coverage, and resistance to repeated cleaning are critical. | Request coating type, approximate coating purpose, maximum sterilization conditions, and evidence that repeated processing does not cause peeling or edge damage. |
| 4 | Verify ISO 1797 shank dimensions | Type 1: nominal shank diameter 2.35 mm; straight handpiece instruments Type 2: nominal shank diameter 2.35 mm; contra-angle latch-type instruments Type 3: nominal shank diameter 1.60 mm; friction-grip instruments | ISO 1797 classifies dental rotary instrument shanks by connection type and dimensions. The correct nominal diameter alone is not sufficient; the handpiece connection, retention feature, and usable length must also match. | Check the ISO 1797 type, nominal shank diameter, retention geometry, concentricity, and the handpiece manufacturer's compatibility requirements. Overall length and working-end dimensions require a separate drawing. |
| 5 | Prioritize cutting efficiency and heat control | Flute count, flute depth, rake angle, sharpness, cutting length, and external or internal irrigation | Bone temperature can rise when drilling pressure, rotational speed, friction, or cutting blockage increases. Copious sterile irrigation and an efficient, sharp cutting geometry help reduce heat and clogging; clinical protocols must define the appropriate speed and load. | Look for irrigation access that is not blocked by the drill design, clearly stated operating limits, and a flute profile that evacuates bone debris effectively. |
| 6 | Assess runout, balance, and dimensional control | Straightness, concentricity, shank tolerance, cutting-edge symmetry, and surface finish | Excessive runout can increase vibration, create an uneven osteotomy, and accelerate wear. Dimensional accuracy is especially important for pilot and final drills used in a controlled sequence. | Request inspection tolerances or quality-control information, and reject instruments with visible bending, burrs, damaged shanks, or uneven cutting edges. |
| 7 | Confirm reuse, cleaning, and traceability requirements | Single-use or reusable; validated cleaning method; steam-sterilization compatibility; inspection and replacement limits | Repeated use can reduce sharpness, alter dimensions, damage coatings, and increase the risk of corrosion or fracture. Reprocessing instructions must be validated for the specific instrument design and material. | Choose products with clear instructions for use, lot identification, sterilization parameters, inspection criteria, and a defined replacement policy. |
Choosing Implant Drills is not simply matching a bur to a fixture. Diameter and sequence should reflect implant width, length, and bone density.Misch’s published radiographic classification places D1 above 1250 HU, D2 at 850–1250 HU, D3 at 350–850 HU, and D4 at 150–350 HU. These values are guides, not promises. Cone-beam measurements can vary with scanner settings and artifacts.
In dense D1 or D2 bone, a full-diameter preparation may reduce compression and heat. Use irrigation, sharp drills, and controlled speed. A narrower final osteotomy may help D3 or D4 bone retain purchase. However, excessive undersizing can increase insertion torque, crestal strain, and early remodeling.
A 2022 systematic review in Clinical Oral Implants Research found that undersized osteotomies improved primary stability, but protocols and evidence quality varied. The review did not establish one ideal undersizing percentage.
Match the final drill to the implant’s body diameter, not merely its platform. Keep the sequence graduated, verify depth, and reassess after each osteotomy. ITI consensus literature supports adapting preparation to bone quality and loading conditions.
My practical lesson is less tidy: soft bone does not always need aggressive undersizing, and dense bone does not always forgive it. Confirm torque, stability, and anatomy before loading. If the drill binds, stop. Real bone rarely behaves like a scan.
Choosing the best implant drill requires more than matching diameter and length. Heat control deserves equal attention. During osteotomy, friction can damage bone before the clinician notices a problem. Clinical guidance commonly uses 47°C for one minute as a warning threshold, not a target.
A brief pause matters. Experienced clinicians watch irrigation, drilling pressure, and bone debris closely. A warm drill, packed flutes, or slow saline flow can raise temperature quickly. A useful Dental Implant Pilot Drill Guide should explain flute design, cutting efficiency, drill length, and irrigation access. Choose sharp, concentric drills that remove debris instead of pushing it deeper. Do not chase speed. Excessive pressure creates heat even when the motor sounds normal. External irrigation may fail inside a narrow osteotomy, especially when soft tissue blocks the fluid path.
Use the recommended speed and intermittent strokes for the selected system. Keep the drill moving, but avoid aggressive lateral widening. Check the osteotomy wall between steps. Bone that looks glazed, smells burnt, or feels unusually hard deserves attention. These signs are not perfect temperature measurements. Temperature monitoring is rarely available chairside, which makes technique partly imperfect. I still recommend recording the drill sequence, irrigation method, and any unexpected resistance. That record can reveal habits needing correction, such as pressing too firmly or skipping a cooling pause. Fresh saline helps, but it cannot compensate for a dull or poorly maintained drill.
Choosing the best Drill Implant requires more than comparing shapes or materials. The surgical motor settings deserve equal attention. In many osteotomy procedures, 800–1,500 rpm provides a practical working range. Lower speeds may support controlled cutting in dense bone. Higher speeds can improve efficiency when the site allows it. Always follow the implant system’s validated instructions and the clinician’s training.
I usually treat 50 mL/min as a useful irrigation reference, not an automatic rule. A steady saline stream should reach the cutting area directly. Watch the fluid path, suction position, and bur flutes. Poor access can reduce cooling, even when the pump displays 50 mL/min. Keep the field visible. Avoid intermittent irrigation.
Torque needs individual adjustment. Bone density, drill diameter, and insertion resistance all matter. A motor limit that works in soft bone may be unsuitable in dense cortical bone. Set torque conservatively, then assess tactile feedback and motor response. Do not force the drill when resistance rises. Stop and inspect.
Small details matter.
Experienced clinicians also check calibration before treatment. They review the handpiece, tubing, bur condition, and irrigation reservoir. I have learned that fixed numbers can create false confidence. A setting may look correct on paper but perform poorly in a wet, narrow surgical field. Record the selected speed, torque, and irrigation rate, then reflect on the result after each case.
Verify cutting accuracy before judging speed. Ask for test data using the intended bone density and drilling protocol. A 2023 systematic review in Clinical Oral Implants Research reported typical guided-surgery angular deviations near 3–5 degrees. Small errors can increase near vital structures. Tip: Choose drills with documented diameter tolerance and repeatable cutting performance.
Check runout at the working tip, not only at the shank. Excessive runout creates uneven cutting, vibration, and heat. ISO 1797:2017 defines important requirements for rotary dental instruments, including shank dimensions and material performance. Tip: Request runout measurements at a stated rotation speed. Tip: Inspect the drill under magnification. Bent edges are not harmless. Tip: Confirm that depth marks remain readable after repeated cleaning; shallow markings can mislead tired clinicians.
Match depth marks with the actual osteotomy depth. Do not rely on color alone. Tip: Compare the physical mark with a calibrated surgical stop or measuring gauge. The U.S. FDA’s 2023 Medical Device Reports guidance stresses traceability, inspection, and documented device performance. Tip: Review the cleaning and reuse instructions carefully. Tip: Confirm guide-system fit with the exact sleeve, offset, and drill diameter. Tip: Test the assembly before surgery. One lesson deserves attention: a drill may cut well but fit poorly. That is a preventable failure.
Choosing an Implant Pilot Drill demands more than checking diameter and price. Sterility, reuse limits, inspection, and traceability directly affect surgical reliability. CDC guidance classifies drills that contact bone as critical instruments. They require validated heat sterilization between patients, not surface disinfection. WHO’s 2022 Global report links strong infection prevention programs with reductions of up to 70% in healthcare-associated infections.
Tip: Confirm the sterilization method. Check packaging integrity, chemical indicators, and cycle records. A wet pouch is not ready for use. Small details matter.
Reuse limits need written evidence. Follow the manufacturer’s validated number of cycles, even when the drill looks sharp. Cutting efficiency can decline before visible damage appears. In practice, I would record each cycle with a unique tray or instrument code. An Implant Pilot Drill without traceability creates a weak audit trail. That is uncomfortable, but important. CDC recommendations also support documented sterilizer monitoring, including biological indicators at regular intervals.
Tip: Inspect under bright magnification. Look for bent flutes, dull cutting edges, corrosion, debris, and loose connections. Remove questionable instruments immediately. Do not rely on memory. Digital logs can link the drill, sterilization load, patient record, and operator. A 2023 systematic review in the International Journal of Environmental Research and Public Health reported inconsistent compliance with dental instrument reprocessing practices, showing why routine verification matters. Local workflows may still fail. Review them honestly.
Match the final drill to the implant body diameter. Do not match it only to the platform. Confirm the implant length and anatomy separately.
Yes. Dense bone may need near-full-diameter preparation. Softer bone may benefit from modest undersizing. There is no universal percentage.
It can improve primary stability. However, it may increase insertion torque and crestal strain. The balance is not always obvious.
D1 is above 1250 HU. D2 ranges from 850 to 1250 HU. D3 ranges from 350 to 850 HU. D4 ranges from 150 to 350 HU. These values are guides, not promises.
Keep bone below 47°C for one minute. Use fresh irrigation, sharp drills, and controlled pressure. Apply intermittent strokes. Avoid aggressive lateral widening.
Glazed bone, a burnt smell, or unusual resistance deserve attention. These signs are imperfect temperature indicators. Pause and reassess.
Excessive runout can cause vibration, uneven cutting, and heat. Inspect the working tip under magnification. A bent edge is not harmless.
Compare depth marks with a calibrated gauge or surgical stop. Do not rely on color alone. Test the sleeve, offset, and drill assembly before surgery. A drill can cut well but fit poorly.
Stop immediately. Remove debris and inspect the osteotomy. Check irrigation, drill condition, alignment, and anatomy. Real bone rarely behaves like a scan.
Record the drill sequence, irrigation method, resistance, and stability findings. This may reveal excessive pressure or skipped cooling pauses. My approach is not perfect. Review the record honestly.
Choosing the best Implant Drill requires more than selecting a suitable diameter. Begin by defining the drill’s function, geometry, and compatibility with the intended implant system. Evaluate the material, surface coating, and ISO 1797 shank dimensions to ensure secure attachment and dependable performance. The drill diameter and preparation sequence should correspond to the implant size, while bone density must guide the progression from initial to final drilling.
Heat control is essential for protecting bone; maintain adequate irrigation and keep the temperature below 47°C for no longer than one minute. Depending on the procedure and clinical conditions, speed may generally fall within 800–1,500 rpm, with irrigation near 50 mL/min, while torque settings should follow the surgical protocol. Before use, verify cutting accuracy, runout, depth markings, and guide-system fit. Finally, confirm sterility requirements, permitted reuse limits, inspection procedures, and traceability records to support consistent, safe, and controlled surgical preparation.