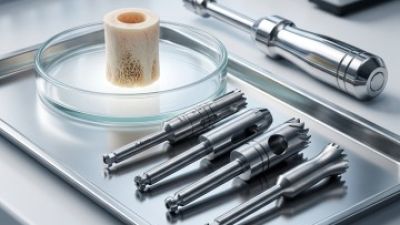
Choosing the right Sinus Lift Kit isn’t just about grabbing the biggest tray or the cheapest option out there. When dealing with posterior maxillary implants, things can get pretty tricky—limited bone height, variations in sinus anatomy, sensitive membranes, and different surgical techniques all come into play. The American College of Prosthodontists reports that about 36 million Americans are completely without teeth, and roughly 120 million are missing at least one tooth. Those numbers really highlight why there’s such a growing demand for implant-based solutions. But—and here’s the catch—not every kit is gonna work for every patient in the same way.
At the end of the day, clinical evidence should be your guiding star. A systematic review published in Clinical Oral Implants Research showed that sinus floor elevation, when done right, can lead to predictable implant success. But outcomes depend on a bunch of factors—residual bone height, membrane management, infection control, and of course, the surgeon’s experience. The Journal of Clinical Periodontology also stresses how important it is to have a proper diagnosis and risk assessment before jumping into implant surgery.
Your ideal kit should match your chosen technique—whether you're going with a lateral window or a transcrestal approach. Plus, it needs to include tools that actually feel good in your hand—not just shiny gadgets you see in a catalog. The obvious, right? Still, it’s surprisingly easy to overlook. Look for clear instructions, traceable materials, ergonomic design, and compatibility with sterilization procedures. Don’t forget about regulatory documentation either. And support from the manufacturer—training, post-sale help—that really matters.
The dental implant market is booming, according to Grand View Research, but just because a product is popular or widely used doesn’t automatically mean it’s top quality. When choosing your kit, weigh up the clinical evidence, the durability of the instruments, how complex cases get handled, and your total costs—both in time and money. No single kit is perfect for everyone. Even seasoned pros often find they need to reassess their choice after reviewing a CBCT scan, since anatomy can sometimes throw a wrench in the plans. To help you out, this guide lays out seven practical tips to make your decision a bit easier—and more thoughtful.
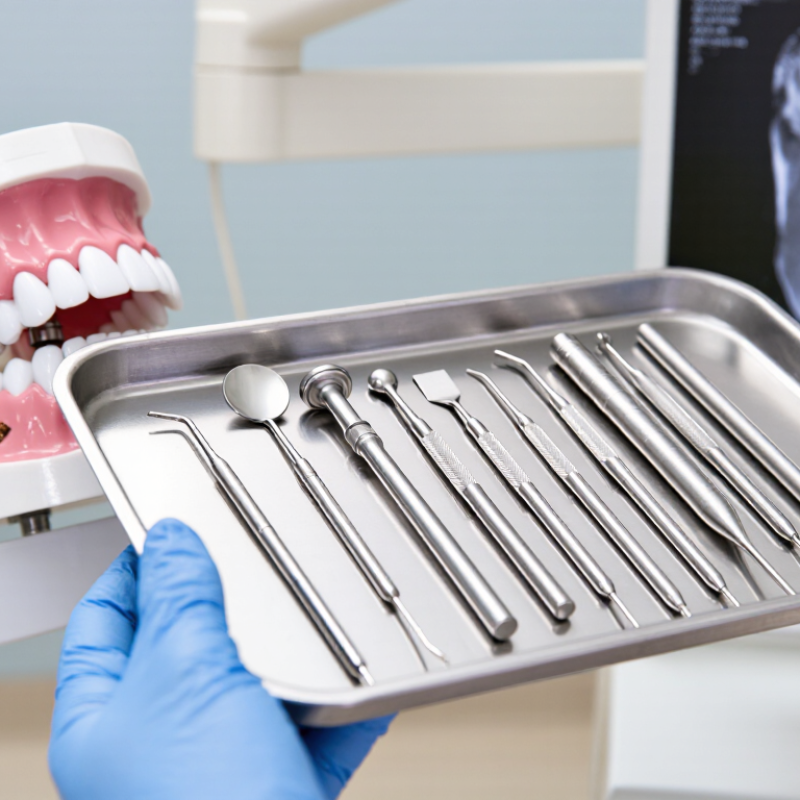
Define the Clinical Requirements for the Sinus Lift Procedure
Choosing a Sinus Lift Kit should begin with the patient, not the instrument tray. Define the clinical requirements before comparing kit features. Cone-beam computed tomography can show residual bone height, sinus width, septa, membrane thickening, and nearby anatomy. Two-dimensional images may miss important details. Good planning starts here.
For a Direct Sinus Lift Kit, assess whether the planned access matches the sinus anatomy and implant strategy. Consider residual bone height, primary stability, graft volume, and the available surgical space. The kit should support controlled access, gentle membrane elevation, irrigation, and accurate graft delivery. Active sinus infection or significant sinus disease requires appropriate evaluation before surgery. Medical history also matters, including healing risks and medications that may affect treatment planning.
A practical checklist should include membrane management, visibility, instrument control, and backup options. Small differences matter, such as handle comfort or the working length of an elevator. They affect precision during a narrow procedure. Experienced clinicians also review previous sinus surgery, smoking habits, and patient expectations. A complete-looking kit is not always clinically complete. I would still question whether every included instrument fits the planned anatomy. That reflection can prevent unnecessary tools and reveal missing essentials. Final selection should follow documented imaging, patient assessment, and the operator’s training.
Assess the Kit’s Compatibility with the Surgical Technique
Choosing the Right Sinus Lift Kit: Assess the Kit’s Compatibility with the Surgical Technique
A Sinus Lift Kit should match the planned approach, not merely the surgeon’s preferred instruments. Transcrestal elevation usually requires narrow osteotomes, depth stops, and controlled irrigation. AnInternal Sinus Lift Kit may suit sites with adequate residual bone and limited vertical deficiency. However, CBCT findings must guide that decision. The 2022 ITI Consensus Report emphasizes three-dimensional assessment of sinus anatomy, residual bone height, membrane condition, and implant stability before treatment.
Technique determines instrument demands. A lateral-window procedure may require larger burs, a safe cutting sequence, membrane elevators, and instruments with different angulations. A 2020 systematic review in Clinical Oral Implants Research reported high implant survival after sinus augmentation, often above 95%, but noted considerable variation in study designs and patient selection. That figure should not become a promise. It reflects controlled cases, experienced clinicians, and follow-up conditions.
Look closely at working length and tactile feedback. Can the stops be adjusted for a 7 mm residual ridge? Does the kit allow gradual elevation near a septum? Are the instruments compatible with the planned implant osteotomy and irrigation system? Small mismatches matter. In practice, a universal kit can feel convenient but may offer poor control in unusual anatomy. I have seen checklists miss sinus width and membrane thickness. That omission deserves correction. The kit should support the technique, the imaging, and the operator’s verified training—not replace clinical judgment.
Check the Quality and Sterility of Every Included Instrument
Choosing a Kit Sinus Lift begins with the instruments you can inspect, not the photograph on the package. A reliable kit should include clear material information, intact sterilization pouches, readable lot numbers, and instructions for use. Check each curette, osteotome, drill, and irrigation component under bright light. Look for burrs, corrosion, loose handles, blocked channels, or uneven edges. Small defects can damage tissue or reduce control.
Sterility requires documented processing. The CDC’s 2016 Summary of Infection Prevention Practices in Dental Settings classifies instruments entering soft tissue or bone as critical items. These instruments must undergo heat sterilization. CDC guidance also recommends biological monitoring at least weekly, and during every load containing implantable devices. AAMI ST79 further emphasizes validated cycles, proper loading, drying, and traceability. Ask whether the Kit Sinus Lift supports these requirements. A sealed pouch is not proof of sterility if it is wet, torn, expired, or poorly stored.
Inspect every hinge. Do not guess.
In practice, a polished instrument can still conceal a weak seal or a rough working tip. I would also compare the kit’s reprocessing instructions with the clinic’s sterilizer capacity. That step is easy to overlook. If instructions are vague, materials are undisclosed, or indicators are missing, pause before purchase. Quality control is not only about appearance; it is about repeatable performance, documented sterilization, and evidence that each included instrument remains safe for its intended use.
Compare Access Design, Tip Options, and Ease of Handling
Choosing the right Sinus Lift Kit requires more than counting instruments. Access design should match the surgical approach, visibility, and available working space. A narrow lateral access may preserve tissue, but it can limit instrument movement. A wider opening may improve visibility, yet it can demand more careful closure planning.
Compare the tip options closely. Rounded tips may support gentle membrane elevation, while sharper profiles can improve control in dense bone. The useful question is not how many tips are included. It is whether each tip has a clear purpose. A Hydraulic Sinus Lift Kit may offer controlled fluid pressure, but pressure settings, irrigation flow, and membrane resistance still require clinical judgment. Small differences matter.
Handling is often underestimated. Check the grip with gloves, the balance during prolonged use, and the ease of changing tips. Instruments should feel stable when visibility is limited. They should also tolerate cleaning and sterilization according to verified instructions. Ask whether the kit fits your existing handpieces and irrigation system. Compatibility problems can interrupt a carefully planned procedure.
A practical review should include feedback from trained clinicians, not only catalog measurements. Try the instruments on a simulation model when possible. Notice awkward angles. Notice hand fatigue. A kit may appear efficient on paper but feel demanding in real use. Imaging, anatomy, training, and manufacturer instructions must guide the final selection. The cheapest option is not always economical. The most complete kit may also contain unused tools.
Evaluate Material Safety and Manufacturer Reliability
Material safety should lead every sinus lift kit decision. The instrument enters a delicate surgical field, so material traceability matters. Check whether the manufacturer identifies stainless-steel grades, coating composition, and sterilization compatibility. ISO 10993 guidance supports biological evaluation for medical-device materials, but certification alone is not a complete safety guarantee. Ask for test summaries, not vague claims.
Look closely.
A 2022 meta-analysis in Clinical Oral Implants Research reported implant survival rates of roughly 96–98% after sinus augmentation. However, outcomes varied with graft type, surgical technique, and follow-up duration. That finding should make clinicians cautious. A kit cannot compensate for poor handling, unclear instructions, or unsuitable anatomy. Review corrosion resistance, edge finishing, torque markings, and packaging integrity before clinical use.
Manufacturer reliability requires evidence over time. Check ISO 13485 certification, production-site details, lot numbers, complaint procedures, and recall history. The FDA’s MAUDE database can reveal reported device problems, although reporting data may be incomplete and cannot prove causation. Ask whether replacement parts remain available. This is often overlooked. A polished package may look trustworthy, yet documentation tells a different story. Even this checklist has limits; independent peer-reviewed evidence is still stronger than sales language.
Review Training, Instructions, and Regulatory Documentation
7 Tips for Choosing the Right Sinus Lift Kit
A sinus lift kit should be judged by its documentation, not its polished case. Assess the trainer’s clinical experience and verify hands-on education. Review the course syllabus, including membrane management, irrigation, complications, and patient selection.
Read the instructions for use before purchasing. The steps should identify instruments, sequence, contraindications, and operating limits. Training matters. A short video is not enough.
Check whether the instructions match the exact kit configuration. Confirm warnings, sterile status, expiry dates, and reprocessing requirements.
Regulatory files should include applicable conformity evidence, quality-system information, and device identification details. In the United States, verify the relevant 510(k) pathway when applicable. In Europe, confirm valid Medical Device Regulation documentation, not merely an old certificate. Also inspect lot traceability and post-market contact procedures. Keep records.
Clinical evidence deserves equal attention. A 2022 systematic review in Clinical Oral Implants Research reported implant survival above 90% in many sinus-augmentation studies, but follow-up periods and techniques varied considerably. That difference matters. High survival does not prove that every kit is easy or suitable for every anatomy.
The ITI consensus literature also emphasizes risk assessment, residual bone height, and operator training.
A practical warning: beautifully organized paperwork can still hide vague instructions. Ask for clarification, compare the documents with your local requirements, and discuss difficult cases with an appropriately trained clinician.
Balance Kit Cost, Reusability, and Long-Term Value
7 Tips for Choosing the Right Sinus Lift Kit?
A suitable sinus lift kit should support predictable handling, not merely offer the lowest purchase price. Compare the initial cost with the number of usable procedures, replacement parts, and maintenance requirements. Check whether instruments are designed for repeated sterilization. Confirm the manufacturer’s instructions for cleaning, inspection, and reprocessing. Small components can wear faster than expected. That matters.
Review the kit’s clinical contents carefully. A useful set may include osteotomes, elevators, depth markers, and instruments for controlled membrane protection. Every component should match the clinician’s technique and the planned surgical approach. Compatibility with existing trays can reduce unnecessary investment. Ask about instrument availability, repair options, and documentation. Reliable support has long-term value. Training also matters. A low-cost kit may become expensive when staff need extra instruction or replacement tools. Evidence-based protocols and qualified clinical judgment should guide the final choice.
Reusability is valuable only when instruments remain accurate and safe after repeated cycles. Inspect edges, handles, markings, and connections at defined intervals. Record usage and maintenance where possible. A simple tracking process can reveal hidden costs. It can also expose poor purchasing decisions. I would not judge value from price alone. A perfect spreadsheet still misses handling comfort, procedure time, and user confidence. Consider feedback from experienced clinicians, but challenge familiar preferences when evidence suggests better options. Select a kit that balances cost, durability, workflow, and documented quality over its expected service life.
Dental Trephine Kit: A Complete Guide to Bone Grafting and Implant Removal
Tooth loss continues to create substantial demand for predictable implant and bone-grafting procedures. The World Health Organization’s *Global Oral Health Status Report* (2022) estimates that oral diseases affect nearly 3.5 billion people worldwide, while the American College of Prosthodontists reports that approximately 36 million Americans are completely edentulous. In this clinical environment, a Dental Trephine Kit provides a practical, organized solution for bone block harvesting, sinus lift access, and implant fixture removal.
A complete kit typically combines trephine drills in multiple diameters, a holding driver or handpiece adapter, and a sterilizable storage case. Consistent sizing and sharpness can help clinicians select the appropriate instrument for different surgical sites and reduce the need to assemble components from multiple sources. For implant centers and distributors, an all-in-one configuration also simplifies inventory management and supports a turnkey surgical workflow.
Custom bone harvesting tools can be produced according to CAD drawings, 3D files, or physical samples, including specific tooth profiles, structures, working depths, flute designs, and cutting-edge geometries. Ultra anti-rust, high-wear-resistant stainless steel with a cross-sectional hardness of HRC 54° ± 2° is available as a standard option, while another stainless-steel series offers an HRC 45°–64° range. Grinding can be tailored to the required edge angle, sharpness level, chip-flute size, and cutting method for specialized clinical applications.
FAQS
The kit should support the chosen approach, imaging findings, and verified clinical training. Transcrestal procedures often need narrow osteotomes, depth stops, and controlled irrigation. Lateral-window procedures may need larger burs, membrane elevators, and angled instruments. A universal kit can seem convenient. It may still provide poor control in unusual anatomy.
It may suit sites with adequate residual bone and limited vertical deficiency. CBCT should guide this decision. Review sinus anatomy, residual bone height, membrane condition, and implant stability. Do not choose instruments from bone height alone. That shortcut deserves reconsideration.
CBCT shows three-dimensional details that ordinary examination may miss. Check sinus width, septa, membrane condition, and residual ridge height. A septum can restrict gradual membrane elevation. Membrane thickness also matters. I have seen checklists omit these details.
Confirm whether depth stops adjust accurately for the planned ridge height. A 7 mm residual ridge is one practical test. Check whether the instruments allow controlled advancement near a septum. Working length should also match the planned implant osteotomy. Small mismatches can interrupt the procedure.
Each tip should have a clear surgical purpose. Rounded tips may support gentle membrane elevation. Sharper profiles may improve control in dense bone. Count fewer tools. Choose useful tools. A larger set is not automatically better.
Review pressure settings, irrigation flow, and membrane resistance. Fluid pressure still requires clinical judgment. Confirm compatibility with the irrigation system and handpieces. Pressure should not replace tactile feedback. That would be an unsafe assumption.
Test the grip while wearing gloves. Check balance during prolonged use and visibility-limited movements. Notice awkward angles and hand fatigue. Confirm that tips can be changed easily. A kit may look efficient in a catalog but feel difficult in practice.
Verify cleaning and sterilization instructions before purchase. Confirm that every instrument tolerates the required process. Inspect hinges, connections, and narrow areas for residue risks. Compatibility with existing equipment matters. A planned procedure should not pause because of an overlooked fitting.
Not necessarily. The cheapest option may create compatibility or handling problems. The most complete kit may contain unused instruments. Compare access design, tip purpose, working length, and clinician feedback. Simulation testing can reveal problems earlier. I would revise the decision after practical testing.
Conclusion
Choosing the right Sinus Lift Kit begins with clearly defining the clinical requirements of the planned procedure, including the surgical approach, available working space, and patient-specific anatomy. The kit should be compatible with the intended technique and provide a practical selection of access designs and tips for controlled handling. Each instrument should be inspected for quality, durability, appropriate material safety, and reliable sterilization performance before use.
It is also important to review the manufacturer’s instructions, training resources, maintenance guidance, and regulatory documentation to support safe and consistent clinical practice. While initial cost matters, the best value depends on instrument reusability, ease of cleaning, replacement availability, and long-term performance. By balancing clinical suitability, handling comfort, documentation, safety, and total ownership costs, practitioners can select a Sinus Lift Kit that supports efficient procedures and dependable patient care.