Leave Your Message
0%

Picking the right Impression Coping might seem like a small detail, but it actually makes a big difference in how accurate, stable, and efficient your implant-supported restorations turn out to be. It’s just a tiny part, but if it’s not chosen carefully, it can cause some hassle in the long run. For example, a loose screw, poor seating, or limited space between teeth can mess up your impression — and then the final crown might need unnecessary tweaks or adjustments.

Did you know? According to the World Health Organization’s 2022 Global Oral Health Status Report, almost 3.5 billion people worldwide are dealing with some form of oral disease. Tooth loss remains one of the biggest challenges when it comes to restoring dental function. That’s why guidelines like the ITI Treatment Guide and ITI Consensus Statements stress the importance of accurate three-dimensional implant transfers, stable placement, and double-checking everything carefully. Whether you’re using an open-tray or closed-tray method, these principles really hold true.

When deciding on your impression approach, it’s best to start by considering factors like implant angle, depth, soft tissue thickness, access, and what kind of restoration you're planning. For complex cases involving multiple units or implants placed at divergent angles, open-tray Impression Coping might be the way to go for better accuracy. On the other hand, if access is tricky or the implants are pretty parallel, closed-tray components can really simplify things. Stock components are quick and straightforward, but customized ones can give you better control over the emergence profile. Just make sure that everything is compatible with the implant platform, connection type, and the manufacturer’s instructions — small details really do matter.

Now, it’s worth mentioning that the evidence out there isn’t always crystal clear. Some studies show splinted techniques work better, while others find similar results with different methods, especially under controlled conditions. That’s why it’s important to remember that a clean impression isn’t a guarantee of a passive, perfect fit. Always double-check seating radiographically if needed, record your component details accurately, and keep good communication with the dental lab. Both the American Dental Association and ITI support making decisions based on the best current evidence, tailored to each individual patient. This guide aims to walk you through practical tips for choosing the right Impression Coping, common pitfalls, and the thought process behind each choice—because in the end, those small details can really make a difference.
How to Choose Impression Coping for Dental Implants?

Understanding the Role of Impression Copings in Implant Dentistry

How to Choose Impression Coping for Dental Implants?

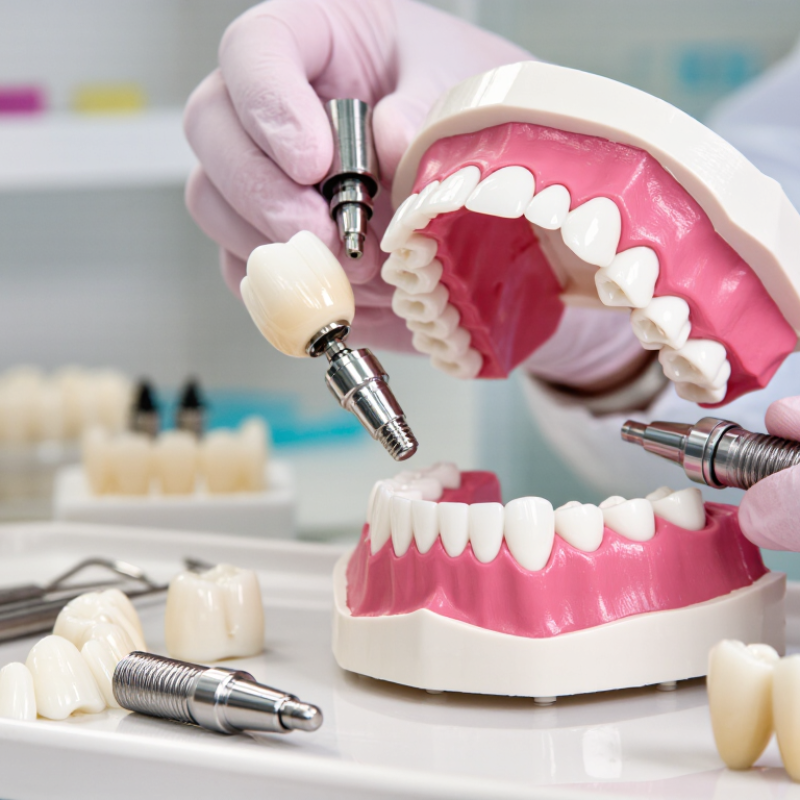
Impression Copings transfer the implant’s exact position to a working cast or digital model. They record depth, angulation, rotation, and platform location. Small errors can alter the final crown’s fit. That is why coping selection is a clinical decision, not a routine purchase.

Open-tray copings suit multiple implants or implants with noticeable angulation. The long screw remains accessible through the tray, allowing direct removal.

Closed-tray copings can work well for a single, favorably positioned implant. Limited mouth opening may make the closed technique more practical.

Soft-tissue thickness also matters. A coping that is too short may fail to seat fully. One that is too tall can disturb the tray or surrounding tissue.

Before impression making, I check the coping’s connection, seating, and stability.

A periapical radiograph can help confirm complete seating when visibility is limited. The coping should not rotate under gentle finger pressure. I also verify tray clearance around the screw or coping head. This step is easy to skip. It should not be.

Impression material must capture the coping without movement. Splinting may improve accuracy in selected multiple-implant cases, but it adds handling time and technique sensitivity. Digital scanning can reduce some laboratory steps, yet scan bodies still require complete seating and clean surfaces. No Impression Coping eliminates every source of error. Patient movement, moisture, limited access, and operator judgment remain important. Rechecking the connection after removal is wise, even when the impression looks perfect.

Identifying the Main Types of Implant Impression Copings

How to Choose Impression Coping for Dental Implants?

Identifying the Main Types of Implant Impression Copings

Implant Impression Copings transfer the implant position to a working cast or digital model. Their design affects accuracy, seating, and soft-tissue control. The two main types are open-tray and closed-tray copings.

Open-tray copings, also called pick-up copings, remain locked inside the impression. The clinician unscrews them through tray openings before removing the impression. This method reduces coping movement and suits multiple implants or non-parallel implants. It requires a rigid custom or modified tray. Tray access must be checked carefully. A small opening can block the driver.

Closed-tray copings, or transfer copings, stay attached to the implant during impression removal. Afterward, they are removed and repositioned inside the impression. This approach is quicker and often works well for single, straight implants. However, repositioning errors can occur. The coping must fully seat against the implant connection. A faint gap may change the final restoration.

Some clinicians also use scan bodies for digital impressions. These components provide reference geometry for intraoral scanners. They must remain stable and free from saliva or powder buildup. The connection should be inspected before scanning. The term Coping De Impression may appear in multilingual product searches, but the clinical principles remain the same.

Selection depends on implant angulation, depth, number, and access. A deep posterior implant may favor an open-tray technique. Limited mouth opening may make that choice difficult. Clinical judgment is essential. Even experienced operators can overlook tray flexure or incomplete seating. Clear radiographic or visual verification can prevent an expensive remake.

How to Choose Impression Coping for Dental Implants? - Identifying the Main Types of Implant Impression Copings

Impression Coping Type Impression Technique Tray Requirement Best-Suited Clinical Situation Main Advantages Key Limitations Important Selection Considerations
Open-Tray (Pick-Up) Coping Direct technique; the coping is splinted or unsplinted and remains locked inside the impression when the tray is removed. Requires a custom or modified tray with an access opening over the coping screw. Multiple implants, divergent implant positions, full-arch restorations, and cases where implant-level accuracy is a priority. Reduces the risk of coping movement during impression removal and generally provides reliable three-dimensional implant transfer. Requires a perforated tray and adequate intraoral access. Screw access must be reached through the tray during the procedure. Verify that the coping is fully seated, the screw can be accessed, and the tray does not interfere with the coping or adjacent structures.
Closed-Tray (Transfer) Coping Indirect technique; the coping remains connected to the implant after impression removal and is repositioned into the impression before pouring the cast. Uses a conventional, nonperforated tray. Single-unit restorations, limited implant divergence, posterior regions, and situations with restricted access for an open-tray procedure. Simple workflow, no tray perforation is normally required, and the technique is convenient for routine single-implant impressions. Repositioning errors may occur if the coping is not accurately reseated in the impression. It is less suitable for markedly divergent or complex multiple-implant cases. Confirm the coping’s orientation and complete seating in the impression before pouring the working cast.
Snap-On Closed-Tray Coping Indirect technique using a friction-retained coping that is attached to the implant and disengages from the implant when the impression is removed. Usually compatible with a standard, nonperforated tray. Straightforward single-implant impressions and selected short-span cases where a fast, uncomplicated procedure is appropriate. Fast placement and removal, convenient handling, and no need for screw access through the tray. Friction retention can vary. The coping may be displaced during impression removal or may not be fully repositioned if the impression is distorted. Check retention, seating, impression integrity, and the correct orientation of the coping before cast fabrication.
Splinted Open-Tray Copings Direct technique in which multiple copings are rigidly connected with a suitable splinting material before the impression is made. Requires a custom or modified open tray with access holes for the coping screws. Full-arch or multiple-implant restorations, especially when implants are widely distributed or angulated. Rigid connection can help minimize individual coping movement and improve the stability of the implant relationship during impression making. More time-consuming and technique-sensitive. Splint material can shrink or fracture, and the tray must provide adequate clearance. Allow appropriate material setting, section and rejoin the splint when indicated, and confirm passive seating of every coping.
Non-Splinted Open-Tray Copings Direct technique with each coping captured independently in the impression. Requires an open tray with access openings for the coping screws. Single implants or multiple implants with favorable distribution, parallelism, and sufficient impression material support. Less complex than splinting and avoids possible splint-material distortion or fracture. Individual coping movement may affect accuracy, particularly in long-span or highly divergent implant arrangements. Use a rigid tray, provide adequate material thickness, and inspect the impression for coping movement or tearing.
Implant-Level Coping Records the exact three-dimensional position of the implant platform or implant connection. Can be used with open-tray or closed-tray systems, depending on the coping design. Cases requiring direct implant-level transfer, including custom abutment, multi-unit, and full-arch treatment planning. Provides direct information about implant location and angulation without relying on a previously fabricated abutment. Requires correct selection for the implant connection and careful verification of complete seating. Match the coping to the implant connection, platform dimensions, and intended restorative workflow.
Abutment-Level Coping Records the position of a selected abutment rather than the implant platform itself. Available in open-tray or closed-tray formats according to the abutment system and clinical technique. Restorations planned around a predefined abutment, including selected fixed prosthetic workflows. Can simplify the restorative procedure when the abutment has already been selected and positioned clinically. Does not record the implant platform directly; changing the abutment later may require a new impression or modified workflow. Use only when the abutment position, height, angulation, and restorative plan have been confirmed.
Digital Scan Body Optical or intraoral scanning technique; the scan body provides a readable reference for implant position and rotational orientation. No conventional impression tray is required, although scan access and soft-tissue management are essential. Digital workflows for single units, short spans, and selected full-arch cases supported by appropriate scanning conditions. Can reduce physical impression materials and laboratory shipping, while allowing immediate digital review of scan completeness. Accuracy may be affected by scan stitching, limited access, reflective surfaces, soft-tissue movement, saliva, and scan-body seating errors. Confirm complete seating, correct scan-body identification, sufficient scan coverage, and compatibility with the digital library used for design.
Short or Low-Profile Coping May be used with either open-tray or closed-tray techniques, depending on its design. Tray selection depends on the specific coping configuration; clearance must be checked carefully. Limited interarch space, reduced vertical clearance, posterior areas, or cases where standard coping height is excessive. Improves ease of seating and may help prevent tray interference in restricted spaces. Reduced height can make visual inspection, screw access, and retention more difficult. Confirm adequate retention, tray clearance, impression-material thickness, and accessibility for tightening or removal.

Matching Coping Design to the Impression Technique

How to Choose Impression Coping for Dental Implants?

Matching coping design to the impression technique is essential for accurate implant records. Open-tray copings suit pick-up impressions, where screws remain accessible through the tray. They are useful for multiple implants, divergent fixtures, or long-span restorations. The coping stays locked in the impression after removal.

Closed-tray copings work with transfer impressions. The coping remains connected to the implant after the tray is removed, then transfers into the impression. This method can be efficient for single implants with favorable angulation. However, limited space or difficult access may make repositioning less predictable. A small seating error can affect the final restoration.

Tips:Check implant connection, coping height, tray clearance, and screw access before mixing material. Confirm complete seating clinically, and use a radiograph when visibility is uncertain. For splinted copings, verify passive connection before impression making. A rigid material and stable tray reduce distortion. Digital workflows require compatible scan bodies, not conventional Impression Copings. Do not assume one design fits every case. Patient anatomy, implant angulation, soft-tissue depth, and laboratory requirements should guide the choice. In practice, rushed selection often causes avoidable remakes. That deserves reflection.

Choosing Between Open-Tray and Closed-Tray Copings

How to Choose Impression Coping for Dental Implants?

Choosing between open-tray and closed-tray copings depends on implant position, angulation, access, and the restoration design. A closed-tray coping remains in the mouth when the impression is removed. The coping is then transferred into the impression manually. This method is efficient for a single, well-aligned implant. It also suits patients with limited opening or difficult posterior access. Fit is everything. A loose coping or incomplete reseating can distort the working cast.

An open-tray coping stays locked inside the impression during removal. This direct transfer reduces one handling step and helps control rotational errors. It is often preferred for multiple implants, especially when implants are angled or widely spaced. A systematic review by Papaspyridakos and colleagues reported better accuracy with splinted open-tray impressions for multiple implants, while single-implant results showed no consistent advantage. The 2023 ITI consensus literature also describes evidence as clinically useful but not absolute.

In practice, I check tray rigidity, coping visibility, screw access, and patient tolerance before choosing. Splinting may improve stability, but poor resin adaptation can introduce new errors. Small errors matter. A closed-tray impression can work exceptionally well when the coping reseats cleanly. An open-tray technique can fail when the tray flexes or the screw channel is inaccessible. The choice should follow the clinical geometry, not habit. Evidence guides the decision, but each case still needs careful verification.

Considering Implant Position, Angulation, and Depth

Choosing an impression coping begins with implant position, not habit.

A straight, shallow, single implant usually permits a closed-tray coping. It works well when the platform is visible and the implant axis is nearly parallel. For posterior implants, limited mouth opening can change the decision. A low-profile coping may prevent tray interference.

Angulation demands more caution. Divergent implants can block coping removal, especially with a closed-tray technique. An open-tray coping often provides better control because the coping remains locked to the implant during removal.

The 2023 ITI Consensus Report supports selecting impression methods according to implant number, divergence, and clinical access.

A 2023 systematic review in Clinical Oral Implants Research also found that impression accuracy generally decreased as implant span and angulation increased.

More implants mean more opportunities for error.

Depth is equally important. A deeply placed implant may need a longer coping, careful tissue displacement, and a custom tray window. The coping must be fully seated. Do not guess. Periapical verification can reveal incomplete seating that looks acceptable clinically.

I have seen small seating errors become major occlusal adjustments later. That shortcut can fail.

For multiple implants, splinting open-tray copings may improve positional stability, although polymerization shrinkage and sectioning can introduce new errors. A 2022 systematic review reported higher accuracy for splinted techniques in many multiple-implant situations, but results varied by study design.

Clinical judgment still matters. Small details matter.

Evaluating Material, Fit, and Clinical Compatibility

Choosing an impression coping starts with material, but material alone cannot guarantee accuracy. Titanium offers rigidity and stable handling during impression removal. Stainless steel can also perform well when its dimensions and surface finish are controlled. Polymer components may reduce radiographic obstruction, but they can flex under pressure. That small movement matters.

Fit requires careful attention. A coping may feel tight and still be incorrectly seated. Confirm the implant connection, platform diameter, and rotational design before placing it. Clean the internal connection and inspect the coping under good lighting. An intraoral radiograph can reveal incomplete seating when tactile feedback seems normal. This step is easy to skip, especially when visibility is limited.

Clinical compatibility includes the tray, impression material, implant angulation, and laboratory workflow. Open-tray copings suit cases where splinting and direct access improve stability. Closed-tray copings may be practical when access is restricted. The coping must remain stable while the material sets. Follow validated sterilization instructions and check for distortion afterward. A common mistake is assuming one coping fits every clinical situation. It does not. I would record the coping type, connection, and seating verification in the patient file. Small records prevent large confusion. Even experienced clinicians should pause when the impression feels unexpectedly resistant.

FAQS

When is a closed-tray coping usually suitable?

It often suits one straight, shallow implant with clear visibility. The implant axis should be nearly parallel. It can help patients with limited mouth opening or difficult posterior access. Fit matters. Confirm complete reseating after impression removal.

When is an open-tray coping preferable?

An open-tray coping often suits multiple implants, angled implants, or widely spaced implants. It remains locked inside the impression during removal. This reduces one transfer step. It may also reduce rotational handling errors. Access still needs checking.

Does implant angulation affect the coping choice?

Yes. Divergent implants can obstruct closed-tray coping removal. An open-tray approach may provide better control. Greater angulation increases possible impression errors. Geometry matters more than habit.

How does implant depth influence impression coping selection?

A deeply placed implant may require a longer coping and tissue displacement. A custom tray window may improve access. The coping must fully seat on the implant platform. Do not guess. A radiograph can reveal hidden seating errors.

What should be checked before placing an impression coping?

Check the connection, platform diameter, rotational design, and coping condition. Clean the internal connection carefully. Inspect the coping under strong lighting. Confirm screw access and visibility. A coping can feel tight but remain incorrectly seated.

Which coping materials are commonly considered?

Titanium provides rigidity during impression removal. Stainless steel can also perform well with controlled dimensions and surface finish. Polymer parts may reduce radiographic obstruction. However, they can flex under pressure. That movement matters.

Can splinting improve accuracy for multiple implants?

Splinting may improve positional stability, especially with multiple implants. Open-tray splinting is often useful for angled or widely spaced implants. Poor resin adaptation can create new errors. Shrinkage and later sectioning may also affect accuracy. It is helpful, not automatic.

What tray and impression issues can cause errors?

A flexible tray can move during material setting or impression removal. An inaccessible screw channel can prevent proper open-tray use. The coping must remain stable while the material sets. Unexpected resistance deserves another check. Shortcuts can fail.

How should the final impression be verified?

Verify coping seating, tray rigidity, material stability, and screw access. Use an intraoral radiograph when clinical visibility is limited. Record the coping type, connection, and seating verification. Small records prevent large confusion. Careful verification still matters.

Conclusion

Choosing the right Impression Coping is essential for capturing an accurate implant position and ensuring a predictable prosthetic result. The selection should begin with understanding the coping’s role in transferring the implant’s three-dimensional location, rotation, and soft-tissue relationship to the working model. Common options include open-tray and closed-tray designs, each suited to different clinical situations. Open-tray copings are often preferred for multiple implants, limited parallelism, or implants with significant angulation, while closed-tray copings may be convenient for straightforward, well-aligned cases.

Clinicians should also consider implant position, depth, accessibility, and the impression material and tray being used. Coping height and design must provide sufficient stability without interfering with adjacent teeth or tissues. Material quality, precise fit, dimensional accuracy, and compatibility with the implant system are equally important. By matching the coping design to the impression technique and patient anatomy, clinicians can reduce transfer errors and support accurate restoration fabrication.

Emma

Emma

Emma is a dedicated professional marketer at Gosmile Medical Technology, a leading ISO-certified high-tech factory based in Dongguan since 2017. With a profound expertise in dental and medical devices, she plays a pivotal role in promoting the company's innovative solutions. Emma is known for her......
Previous How to Use a Dental Torque Wrench?